
Posts
18
Respect
Forum Rank
Legless Crawler
Primary Group
Member
Login Issues
Forgot password?Activate Issues
Account activation email not received? Wrong account activation email used?Other Problems?
Contact Support - Help Center Get help on the UGX Discord. Join it now!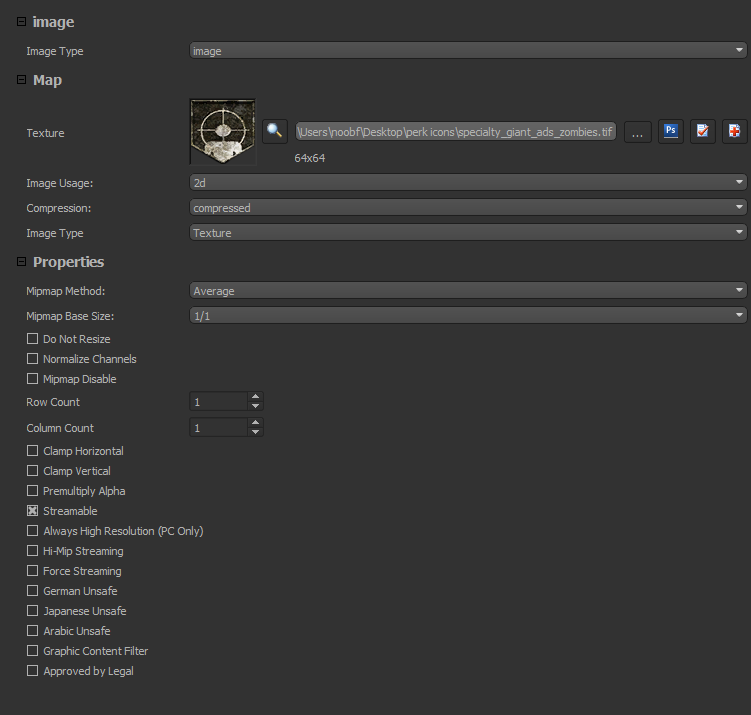

image,specialty_giant_juggernaut_zombies
image,specialty_giant_marathon_zombies
image,specialty_giant_quickrevive_zombies
image,specialty_giant_fastreload_zombies
image,specialty_giant_ads_zombies
image,specialty_giant_three_guns_zombies
image,specialty_giant_doubletap_zombies
image,specialty_giant_widows_wine_zombies
image,specialty_blue_electric_cherry_zombies

 | Benevolent Soul who has our eternal gratitude and exclusive access to betas and the donator section of the forum. |


the minigun powerup shader dont work for me
What issue are you having? The minigun is already made in APE so you just have to edit it there.
where? i have created a new image and like perks i have added
image,t7_hud_zm_powerup_giant_deathmachine
material,materialnameimage,imagename
| Benevolent Soul who has our eternal gratitude and exclusive access to betas and the donator section of the forum. |
This will work for powerups, as far as hud goes all we can edit currently for images of that is the DPAD.

 -
-
