UGX-Mods Login

or login with an authentication provider below
Sign In with Google
Sign In with Twitter
Sign In with Discord
Sign In with Steam
Sign In with Facebook
Sign In with Twitch

Joints not stretching model in some places.

broken avatar :(
Created 8 years ago
by Krazzyboy97
0 Members and 1 Guest are viewing this topic.
1,174 views
broken avatar :(
×
broken avatar :(
Location: gb
Date Registered: 17 September 2014
Last active: 2 years ago
Posts
167
Respect
Forum Rank
Pack-a-Puncher
Primary Group
Member
My Contact & Social Links
More
Personal Quote
W.I.P Rise & Fall
×
Krazzyboy97's Groups
Krazzyboy97's Contact & Social Links76561198105783700Krazzyboyxxkrazzyboy97xx
So i tried using smooth bind in maya and some parts of my character model are stretching. Does anyone have any tips or good settings in maya that will work well with smooth bind? I'm using maya 2015 if that's helpful
broken avatar :(
×
broken avatar :(
Location: tr
Date Registered: 1 March 2013
Last active: 3 days ago
Posts
816
Respect
Forum Rank
The Decider
Primary Group
2015 Contest Winner
My Groups
More
My Contact & Social Links
More
Personal Quote
Caw caw caw
×
johndoe's Groups
Donator ♥ Benevolent Soul who has our eternal gratitude and exclusive access to betas and the donator section of the forum.
Community Mapper Has released one or more maps to the UGX-Mods community which have been added to the UGX Map Manager.
2015 Contest Winner
johndoe's Contact & Social Linksmyc153-johndoe
if it's a character model you're rigging, you're gonna have to paint the verts. if it's a weapon model and the parts like the clip stretches while being moved, you need to use the settings on the screenshot below.

Marked as best answer by Krazzyboy97 8 years ago
broken avatar :(
×
broken avatar :(
Location: kh
Date Registered: 9 August 2013
Last active: 5 years ago
Posts
503
Respect
Forum Rank
Zombie Enslaver
Primary Group
Member
×
codmoddd1234's Groups
codmoddd1234's Contact & Social Links
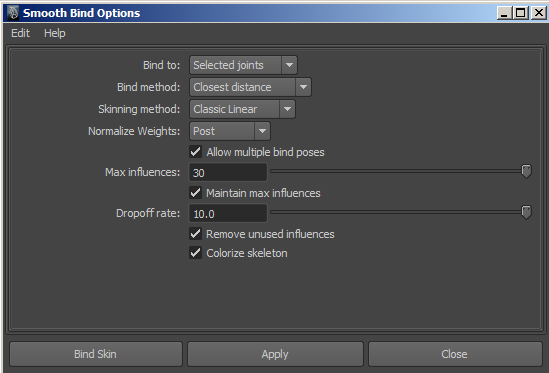
Click the square box beside the smooth bind option.
Make sure its only binding to selected joints and not the entire skeleton. tri only has 3 points that could drive its direction, so set 3 joints max influence. You may need to change the other setting too depending on what your doing.

If it doesnt work you could manually look at the weights by selecting the mesh and clicking...skin... edit smooth skin..... "paint weights tool".
Then scroll through the joints and look for tag_origin or tag sync or any unnecessary joint and make sure they have zero weight, then remove them from the bind by selecting the joint and mesh and clicking edit smooth skin...."remove influence"

 
Loading ...