I am meant to make this tutorial ages ago, lol, but in light of the contest I am aware that many of you want to get involved and probably don't have Maya for custom models that you have possibly found online or maybe you want to make models yourself.
Well fear not! You can use the popular open source 3D Modelling software, Blender! Video version soon.
So before we get started, here's a few things you should have:
Basic knowledge of Blender. Image Editor (Photoshop, GIMP, Paint.net, etc. NOT MICROSOFT PAINT) Texture that is power of 2 (I'll go over making a texture that is Power of 2) and is TGA, JPG or DDS. Model
So to start off we're going to get ourselves a texture, I am going to use this metal texture.
Note: if your texture is a power of 2, then you can skip the PS part.
This will open the Image Size dialogue box, you may also notice a keyboard shortcut, you can use that also.
First thing, un-tick that chain, what this does is maintain's aspect ration, we do not want that in this case.
Like I said your image has to be a power of 2 or you'll get an error when converting it later. You can mix resolutions, i.e. you can go 256x1024 or 512x1024, in this case I'll make it 1024x512 to make it as close to the original as possible.
Note: I recommend not going above 2048x2048 and stay around 1024x1024 or lower so your map isn't full of textures 50mb in size.
So once you have your resolution set press Ok, you can see this how mine came out after I changed it.
Once you're done you can go to File>Save as (Export iirc for Gimp) and save it as TGA, JPG or DDS, if your texture has transparecy or holes such as a fence then use DDS DXT5.
If you're using Photoshop you can use the NVIDIA Texture Tools, I can confirm the DDS Saving works in 2015 but can't get the normals part to work.
Save it to texture_assets in your CoD WaW root, make the folder if it doesn't exist.
Now we're done in Photoshop.
///////////////////////////////////// Tutorial on Blender Starts here
If you don't have Blender download it by Clicking Here. It's free, so grab it.
Next Download Blender-CoD by Clicking Here. The latest one he seems to have doesn't seem to work for me, so the link is to the latest one that worked for me. His official page is here on Github: https://github.com/CoDEmanX/blender-cod
Open Blender, you should see a screen similar to this:
Just click anywhere in Blender to get rid of the Slash screen that you will probably get when starting Blender.
Go to File> User Preferences, then click the Addons tab then Install from File. Locate the ZIP of Blender-Cod you downloaded earlier and install it.
Then click "Testing" and it should show up, there will be a box to the right, tick it and then Save Settings.
You will notice 3 new entries in Import and Export, 1 for Importing Xmodel_exports, 1 for exporting Xmodel_exports and 1 for exporting Xanim_export. We will not be covering xanims.
Make sure to double tap a to selecting everything in-scene, then delete, the sun, camera, etc. will cause errors.
I also recommend importing the xmodel_export of the character from model_export/characters/american/roebuck, this is the size of the player, so you scale your models based off him.
So I have made a basic cube and UV Mapped it as shown below, once again I will not be covering Blender basics such as UV mapping, there are other tutorials for that.
Note: When UV Mapping you may get the error "Object has non-uniform scale, unwrap will operate a non-scaled version of the mesh" when you Unwrap and then it will look weird, as if you can see the inside faces, in editor and game. Thanks to JBird632 informing me what cause this, to fix it, select the offending mesh in Object Mode, press CTRL+A and select Scale, job done. I would avoid using Unwrap though for the most part if I were you.
Looks good, huh? You will learn to worship this Iron Block as you worshiped Bwc's Purple Square.
Next we need to give the mesh a material name, this is the material name you will also be using in Asset Manager.
Go to the side bar and go to the materials tab, then make a new material with the mesh selected and give it a name, I usually like to use this format: mtl_*map I am working on*_*what it is*_*surface type* and possibly _*color* as well.
So I will call this mtl_tutorial_block_iron like so:
All the other settings do not matter as they are specific to blender. The texture's tab need not be touched also.
Note: You may have 2 seperate meshes in your scene that you want to use the same material, but you find when you enter the same name for both of them blender adds .001 to end of one of them, this is because 2 meshes cannot have the same Material name in Blender, what you can do is click the meshes that you want to use the same material name for, and press CTRL+J, this will make them all the 1 mesh, and allow you to give them a material name for all of them since they are now 1 mesh essentially.
Now we can select everything we want to export, then go to File>Export>CoD XModel. Save it under model_export as any name you want.
Now we are done with Blender.
/////////////////////////////// Assman Stuff Starts Here
Now to convert it so it works in-game.
Open Asset Manager via Launcher or via your Bin Folder, then create a new GDT in model_export and save it.
Go to material and create a new entry(ies) with the same name you gave to the mesh(es) in Blender.
I created mine like so, you can use different settings for surface type, etc.
You may notice Normal Maps, Spec Maps, etc, mentioned, you can create them for your model, refer to JohnDoe's tutorial here:
Then press F10 or go to PC Conver>Current Asset Only to convert the material(s).
Next for the xmodel is pretty simple and not worth screenies for, just create a new xmodel entry, name does not matter, name it what you want, and add your Model to the filename. Make it rigid unless it's animated.
You might be asking me what do the LOD's mean, they stand for Level of Detail and adding LOD models that get lower in quality will mean that the further the player is from the model, the model's quality will drop and it swaps out for a lower LOD model.
Now we can use the model in any fashion we want! You can use Asset viewer to view it or add it in Radiant, if you add it in Radiant then there is no need to call it in mod.csv, if you use it in a script then you will need us xmodel,*name of model* in mod.csv.
Also make sure to add the images to your mod's images folder and tick them in Mod Builder.
Hello, I have a map with a central spawn zone that is adjacent to 4 doors a player can take, each with their own zones. When testing zones in the "red fort" in my map, I noticed that the zone adjacent to spawn (red1) works fine and activates spawners properly, but red2 and any subsequent ones don't. As a result the start_zone_spawners and red1_spawners are the only ones that spawn.
The doors and triggers have the same KVPs except of course for the zone names. The zones aren't touching and I heard both that the zones should and shouldn't touch, so I'm unsure which it is.
On and off I've spent the last month or so figuring out how to extract sounds from Ghosts. I can't find an exporter nor can I find any info on the FFs. So I just decided to figure it out myself.
NOTE: There is no guarantee you can get the sounds with this method, but you have a fairly good chance. I was able to extract sounds including fire, clip ins, etc. for Bulldog and Magnum.
This tutorial is a little full on so take it step by step, if you need assistance I'm usually on Chat of just ask here. Don't look at it and think 2 complex 4 me, it really isn't. If I the idiot could figure it out you can follow these instructions. If you think I've gone wrong anywhere here please let me know, pretty sure I didn't skip any parts as I pretty much typed as I ported the sound.
You don't need to understand hex, basic knowledge is all we need, if you're able to open and close a program, you're fine.
Decompiling the FF
To begin, we're going to need to decompile the FF. This involves determining which FF the gun sounds are in, I usually go by SP ones if the gun is in SP since I find it easy because fewer weapons are in one level, your preference, if it's in MP only (including DLC ones) make sure to use MP ff's.
I'm going to rip the sounds for the Bulldog, note that make sure to go on Wiki and find out the name of the gun in game files, the Bulldog for example is referred to as Maul, not Bulldog. The Bulldog is in a few levels, but I am going to extract it from No Man's Land aka nml.ff.
So open FF Viewer 3.0 and drop the FF onto it, it will take a bit to extract, so be patient and wait until it exports fully, if you get any errors let me know, but I haven't got any yet.
This is where it gets bit confusing maybe, and requires some thinking. Open the .dat file in HxD and it should look similar to this (not 100% exact obviously):
Try not the get confused, k? So let's search for the sound, remember I told you to take note of the weapons in-files name? Press CTRL+F to search and search for it.
Ignore them and press F3 to skip to another entry, they are joint names probably, possibly for anims/models. Also skip ones with mtl_, nrm, col, spc etc. in the name, materials ant texture names. Also stuff like _lod. I usually find the audio section of the .dat to be located about below mid-way with the slider at the side.
Go until you find something named simialr to this, with npc, plr, etc. at the end, as this is probably a soundalias name, we are getting close.
This is probably a sound, put the cursor after the dot at the end and take note of the offset.
Now since the alias and sounds are usually jumbled together in this, do another search for your weapon to bring you to the next entry, which as we see is probably an alias, take note of the part before the alias name like we done with the dot after our sound name.
Now with the 2 offsets you've taken note off, press CTRL+E or Edit>Select Block, this will allow us to select the entire section that is possibly the audio.
We shall enter the first offset we took into the Start, and the last on, into the End and press Ok, this will select the entire block like so:
Now copy this, if you copy too much don't worry, we can always chop it off in Audacity.
Now make a new file in HxD and paste it in, if it gives a warning about File Size being bigger, press Ok. Now you can save this to where ever, file extension doesn't matter either.
Now you can keep repeating this step for different sounds, like this is clip in, we can do another search for clip_out, fire etc.
Just another demonstration with a bit less detail:
From where we are, search again for what might look like a sound, again, keep going until you find it (usually reload sounds will be foley/soundname and it is probably only a few lines under our first block for the clip in):
Once that's done assuming you done it right, it should work. After that it's just exporting it to WaW, which you can learn about in another tutorial (Zeroy's Wiki has some good tuts for sounds for both IW3 and T4).
Do not ask for sounds on this thread, happy modding, enjoy your sounds if you are successful with it, make sure to trim off any bad sound if there is some.
Credits:
R00feR: Assistance and Tips Developers of FF Viewer: FF Viewer IW: Dirty bastards making our modding lives harder.
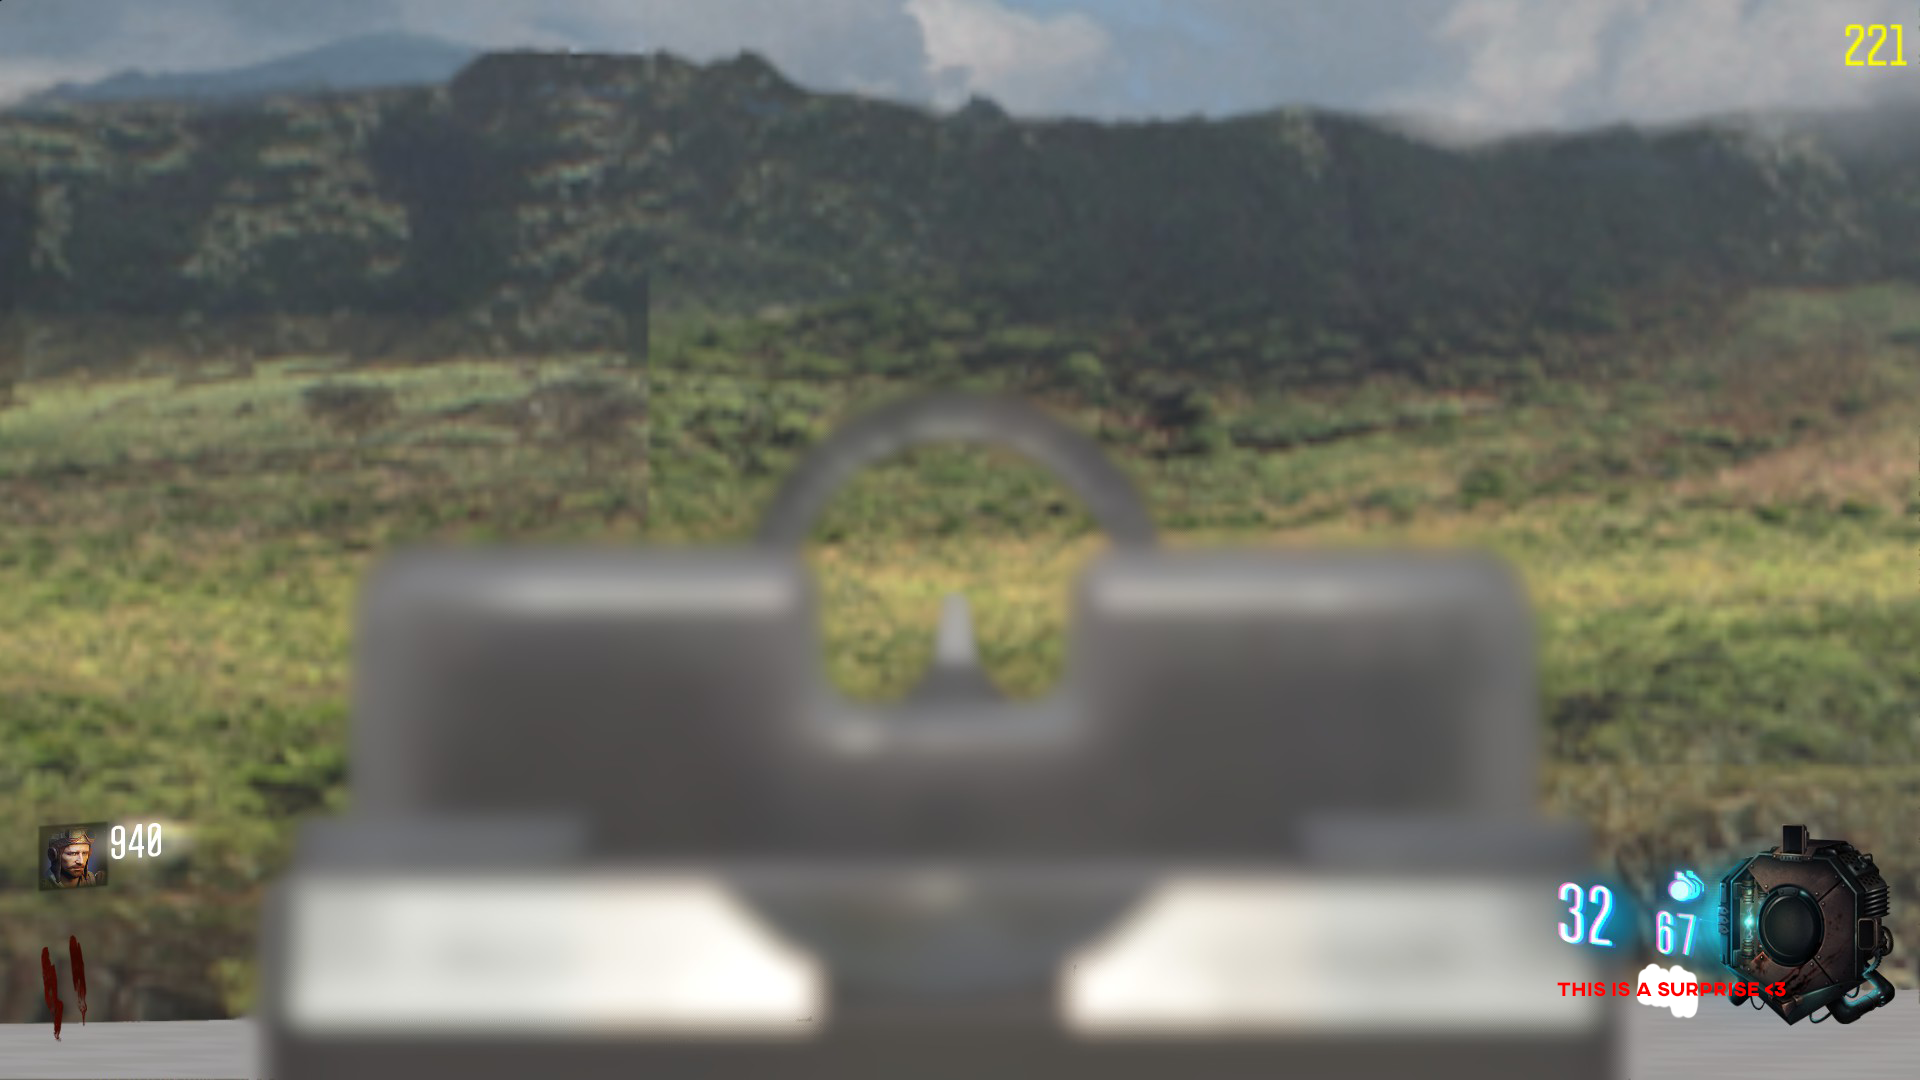
When I ADS it zooms in far too much (picture below) and this is from porting the weapon files from bo2 to bo3. I used the default bulletweapon file and it works perfectly (other than then the stats being completly wrong and the crosshair and fx are non existant). Please can someone tell me what stats to change? I cant find what I am struggling to find out exactly what I am missing. Thanks
Double Post Merge: March 04, 2017, 01:00:44 pmNever mind I fixed it by changing these values:
As my experience yes, u can give out assets from other games than call of duty as i think off, or just give out images that aint converted yet.
I dont have anything against sharing assets i think its just fine and cool if people share their work.
U could wait though till an moderator or admin comes and they can check ur post maybe ur lucky idk. Double Post Merge: February 16, 2017, 01:43:29 pmYou can post assets on CFGFactory atleast
Idk if this gets taken down ill put it on modme instead. I just thought it was kind of sad no one else posted in this topic.
Just a little reminder, if i do remember i guess im correct but you should not share assets on UGX, it could result in a ban, not on first time but if you do it 2-3 times equals ban.
I published a asset to sometime back in the days and i got a warning.
Wait so if I port a big collection of models and I no longer have any need for them and decide out of the goodness out of me heart to had them out to the community I will/could get banned?
This is the first weapon I have ever ported over that I have got to work (thanks to Canadianpro17th for helping me ) so please don't be harsh . The tutorial is down below.
Code Snippet
Plaintext
Instructions:
1: Insert everything from the "Root" folder into your Black ops 3 root folder (Usually found in "C:\Program Files (x86)\Steam\steamapps\common\Call of Duty Black Ops III")
2: Inside your root folder, navigate to Share/raw/sound/aliases and open up your user_aliases.csv
3: Copy and paste the text inside the user_aliases.csv found in the folder provided into your user_aliases inside the aliases folder.
4: Go onto your launcher and right click on the map you want to use the weapon on and click "Edit zone file".
5: Copy and paste the text below into your zone file

// SpSSdy's Guns
weaponfull,bo2_galil

6: Compile and link your map and the gun will be in the map!
YOU MUST CREDIT ME AND THE PEOPLE BELOW IF YOU USE IN YOUR MAP CanadianPro7th Ray1235 Scobalula DTZxPorter Azsry Collie
 Show Posts
Video version soon.
After that it's just exporting it to WaW, which you can learn about in another tutorial (Zeroy's Wiki has some good tuts for sounds for both IW3 and T4).


 ) so please don't be harsh
  .
.